
 It’s official, winter is here! As far as your beauty routine goes, that likely means your skin is getting a little drier, and you may be looking a little paler.
As the self-proclaimed number one advocate for sunscreen use, and someone who couldn’t get a tan even if I tried, self-tanner is my best friend when it comes to achieving that sunkissed look.
Whether you’ve got a special occasion coming up that needs a bit of a bronze, or you just want that summer tan back, here are my top tips to achieving it with as few orange streaks as possible.
Preparation
If you’re someone who likes to shave any part of your body, I recommend doing so at least 24 hours prior to tanning. Though this in itself is a way of exfoliating, you can also go in with a scrub, or exfoliating gloves. After this, you should moisturise from head to toe, ensuring you have a smooth canvas to work with.
The day that you plan to tan, be sure not to apply any moisturisers, perfumes or deodorants to your body, enabling the product to stick evenly all over.
Tanning
If you’ve ever stepped foot in the beauty aisle at Coles or Woolies, you would know that there are hundreds of self-tanners to choose from, and it can be hard to narrow down which one is best for you.
The first thing to make note of is the undertone you’re going for. Some tanners are more neutral, whilst others lean more warm. Which one to go for all depends on your skin tone and the look you’re going for, though most will indicate where they sit on the spectrum on the bottle.
Which type of formula you use, for example, a liquid, oil, or mousse, is also up to personal preference, as is depth! For me personally, I like a tanning mousse with a guide colour (so you’re not completely going in blind), in the shade medium or dark.
If this aligns with what you’re going for, I really recommend the Bondi Sands Aero Self Tanning Foam in 1 Hour Express. This one is reliable, and has a very neutral undertone. You can wash it off after just an hour for a lighter colour, or you can leave it on overnight for a deeper tan.
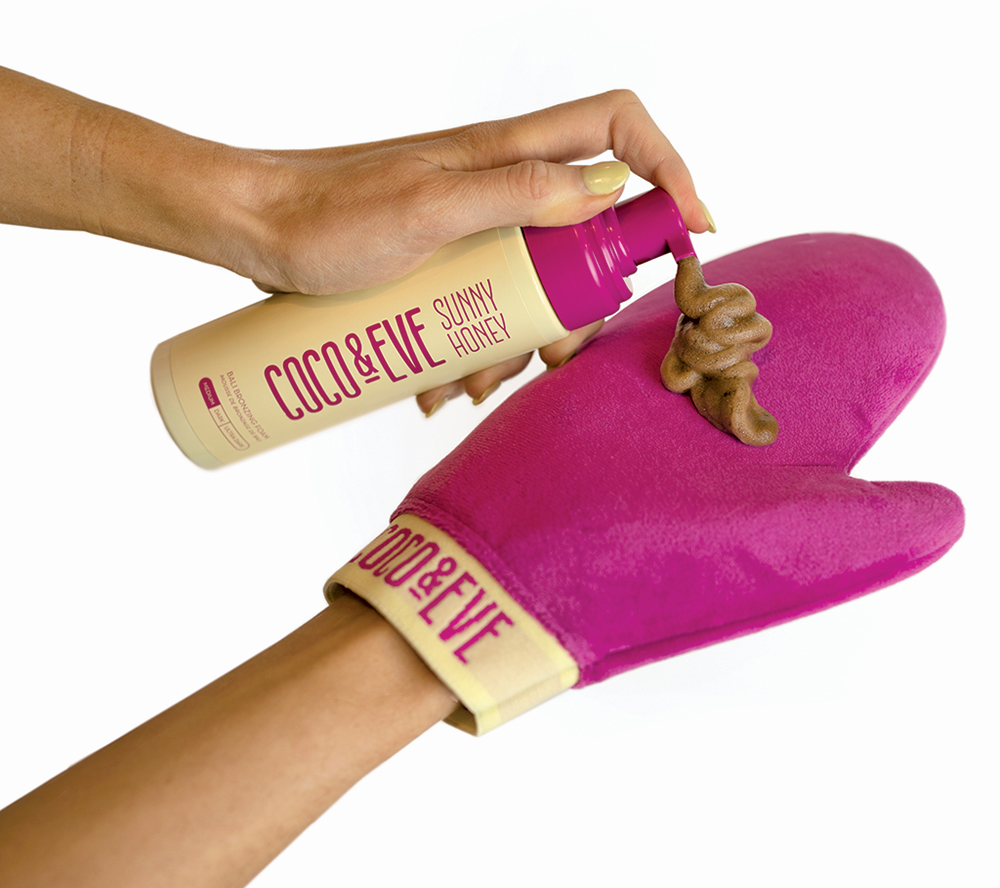
I also really love Coco & Eve Sunny Honey Bali Bronzing Foam, specifically in the shade Dark. It has that traditional, warmer self-tan look, and I find that it applies really evenly, and fades beautifully on the skin with no patchiness. It also gets really dark in just an hour, making it super convenient!
Sontse tans are also really lovely if you’re going for a more natural look and feel, and I really love their self-tanning mitt to use with any product!
As far as tips for application go, my number one recommendation is to apply moisturiser on the driest parts of your body, like your elbows and knees, to prevent the tan clinging and getting darker in those areas. If you’re worried about streaks, you can also pat your tanning mitt over your entire body after applying to make sure there’s no room for swipe marks.
Making it last
Of course, if you’re just tanning for one event, making it last isn’t so important. But, if you’re a weekly tanner, or you’ve got a few things lined up that require a flawless, bronzed complexion, knowing how to go from Monday and Friday with minimal clinging and fading is integral.
One of the most important aspects of making your tan last is ensuring that you’re moisturising regularly. This prevents that dreaded tiger bread look!
If maintaining depth is your main concern, there are products you can use to touch up your tan until you get to removal day. My favourites are the Bondi Sands Everyday Gradual Tanning Milk, and their Liquid Gold Self Tanning Oil.

Cassidy Pearce
Cassidy Pearce is a news and entertainment journalist with The Western Weekender. A graduate of the University of Technology Sydney, she has previously worked with Good Morning Macarthur and joined the Weekender in 2022.